Monday 24th November 2025 was the day that work started on site. The contractors, who are local, made a driveway, with some space for parking and set up the site for another local firm, Panks, to start work on the borehole that we will need for a water supply but which the builders will also need. The contractors have also placed a couple of cabins on the site. Even with this relatively minor start, the site has a completely different feel to it. It really does look like a building site. When I visited on the Wednesday, the drillers had reached down to about 20 meters. I say drillers but the hole is made purely by percussion. They drop down a heavy hollow tube with a trap door on the bottom which allows them to repeatedly pull it up, empty it and repeat. As they go down they line the deepening hole with slightly larger metal tubing and keep screwing on a further piece as this lining drops further down. Once complete they retrieve this lining having sunk what looks like blue pvc piping down to the bottom of the hole they have made. They are in clay at the moment, which is full of water, and aim to reach sand and chalk where the reliable water supply is to be found. In the video you can see the process and the small stone walls they have fashioned to contain the water and silt that they are bringing up. They say it will take two weeks for this part of the borehole to be finished and all the machinery cleared away. Once they have established a supply they pump it out (into a ditch) for up to 48 hours to encourage a flow and for the water to run clear. They will leave a rudimentary water supply for the builders to put to non-potable use. When the house is built Panks will return to install the filtration system that is needed to be able to use the water for drinking. It still seems unbelievable that this is all possible but I suppose humans have been doing this for centuries.
Author: admin
-
Overhead photos of the land
I’m ready to start overhead documenting of the (eventual) building process. First, here’s an indication of where the natural swimming pond will be placed.

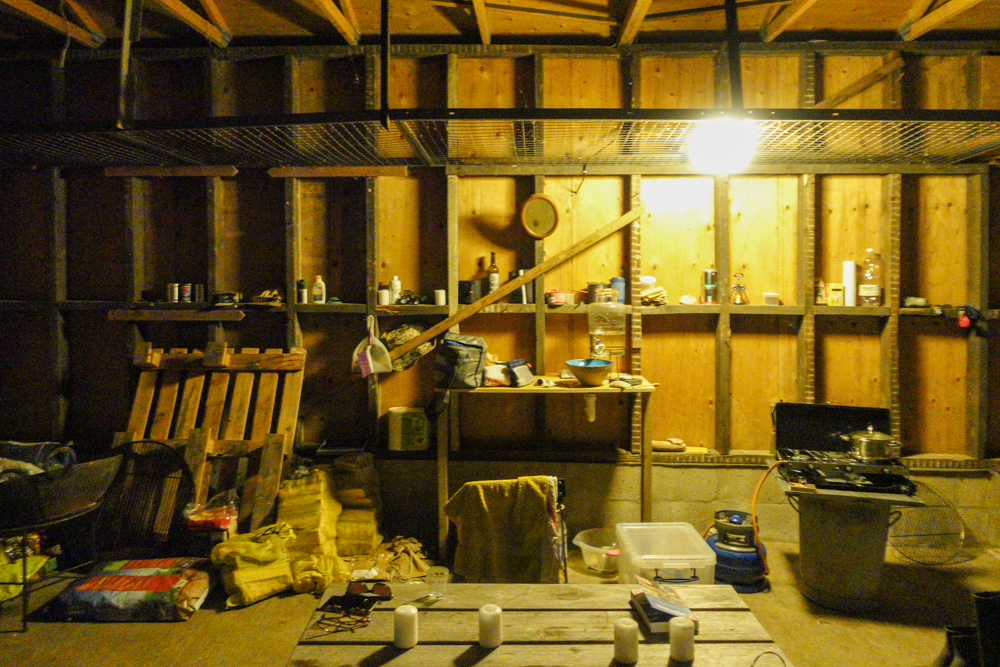
turquoise marks the spot One of may be the last evenings in the barn, powered by battery lights:
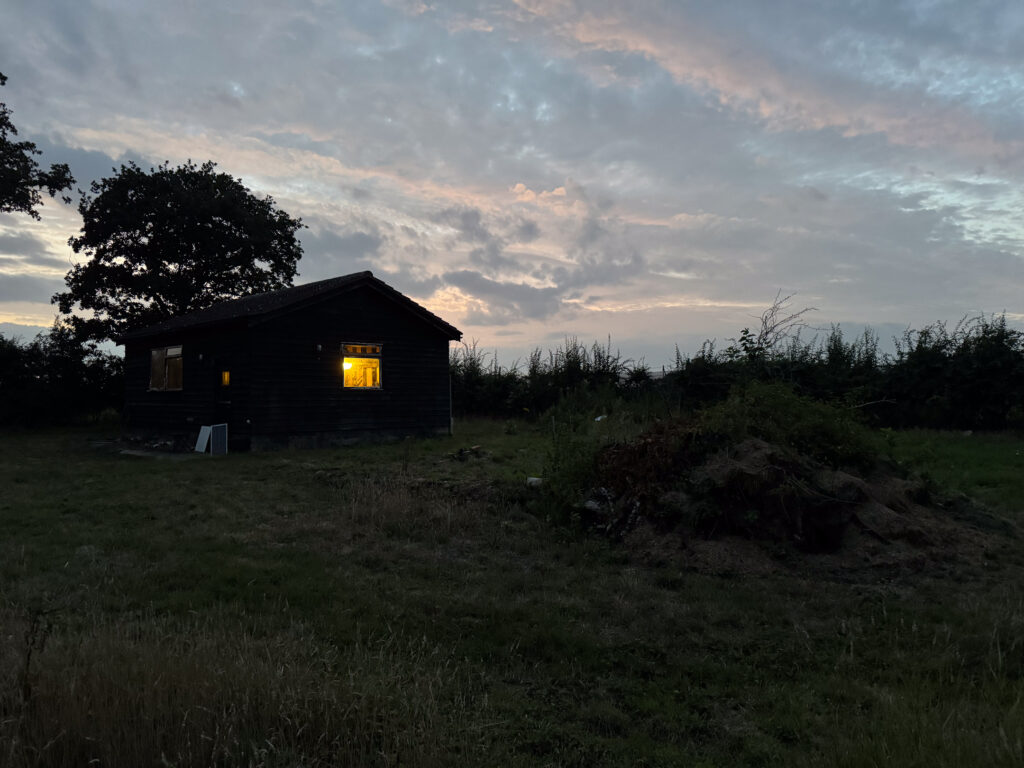
The barn at night We are waiting for the outcome of the tender process and the inevitable trying to shave off (more than shave off) some of the builder’s estimated costs before drawing up a contract and waiting for them to start. Presumably they will demolish and then do some extensive groundwork, including, possibly getting a company in to drill a borehole. But I am getting ahead of myself.
-
Organic/ natural swimming pond workshop in Norfolk
In July (2025) I went to a one-day workshop in Norfolk run by David Pagan Butler. Having your own swimming pond is very appealing and some of those that it appeals to clearly have large budgets – judging by the Youtube promotions by companies offering expensive installations. Pagan Butler’s approach is very much self-build with low-cost materials. Here are my slightly un-understandable notes and some short videos.
Organic Pond workshop
Also see another self-builder http://www.youtube.com/@manuelangerer-permaculture
Materials
UK grown larch can be useful
Clay can be a source of phosphate. You can buy a phosphate meter
Rainwater harvesting is the best source of water to fill a pond. Borehole water is ‘generally pretty good’ but run off water from the ground is the worse.
It is good to wash the gravel or whatever aggregate you use for the planting area before laying. You can use 20mm coarse gravel or 4/10mm pea shingle (https://www.aggregatessupplier.com/product/4mm-10mm-shingle/) and sharp sand mixed 50:50. Gravel is more expensive. Q: how to calculate the amount of aggregate needed? Area by depth?
You can run a bubble pump/aerator from solar power with a set up like mine in the shed.
The pond won’t attract mosquitos because of the many predators and because the water is constantly moving. Mozzies like still water (like a standing bucket).
Basic design principles
The pool needs to be isolated from groundwater and a plastic sheet is the best way to do it.
Aim for (at least) 50:50 proportion swim zone to planted zone by area (because it is to do with the amount of sunlight).
For the skirt/gravel area build with a 1:3 slope with a total of a 1m fall and then a further 1m dig for the swimming zone making the overall depth 2m. A 2m depth helps swimmers not to keep disturbing any sediment at the bottom and causing cloudy water.
Dig a strip foundation ( 6 inches or so) for the blockwork walls. Walls to be 1m high but with a 400mm barrier/top to stop the gravel of the planted zone sliding in to the water. This can be made out of timber. There’s no need for a concrete floor – just smooth out the ground before you apply the fleece.
For the inner walls some have used blockwork laid on its side or build in the normal way on its edge (needs 5 courses). Be careful with backfilling behind the wall. Backfill with sharp sand especially if the ground is clay as this can get so heavy when waterlogged it can make the walls collapse. Aim to backfill as little as possible by digging the initial hole as accurately as possible behind where the dig goes vertically down from the skirt/slope.
20 by 18 metre liner with half price fleece costs about £4000 from the above supplier. Alternatively the liner can be made of pvc but this needs to be welded on site by professional installers so is more expensive. Laying EPDM in a single sheet is best.
Folds can be tricky but you need to fold around your design. More irregular shapes make folding difficult, requiring pleats.
Laying a concrete base is ‘rock solid’ but expensive (and not needed – because later DPB (David Pagan Butler) says don’t do it – just smooth out the ground). But if your digging takes you below the water table then lay something on top of the liner, otherwise rising water will cause your liner to balloon out. (Paving slabs might work) If clay ground then use a concrete base then the liner then more concrete to sandwich the liner.
Do you need the planted/regeneration zone on both sides of the swimming area? As long as there is good circulation this should work.
The slope of the regeneration zone has to be linear to stop the plants sliding down. It needs to be a 1:3 slope. If there is an end stop in place the gravel will stay in place and not fall into the water. Have 300mm depth of gravel and a 400mm topping to the blockwork (which can be made out of wood/sleepers). A new discovery is Recy-Edge lawn edging for the top https://www.thegardenrange.co.uk/p/garden-edging/lawn-edging/recoedge-plastic-garden-edging-plank/.
You need a design around the rim of the pond that stops run off water from the surrounding area flowing into the pond. One way is a kind of pyramid build of cement (a concrete haunch) with the liner layers sandwiched in the inside and on the outside gravel with a French drain running around it. https://greenfrogwaterproofing.com/why-install-a-french-drain-in-your-property/ and https://www.timberwise.co.uk/blog/what-are-french-drains-and-how-do-they-work/
Make the edge so that all 3 layers (fleece/liner/fleece/) end up vertical. Hammer in pegs to define the edge. The water is to rise to 4 inches below the top then a plastic strip.
Another approach to designing this edge is to use lawn edging (as referenced above). This barrier needs to be built all around the pool.
Bill’s pond in Norfolk goes to 2m immediately from the house. His approach: dig the hole/shutter for the concrete steps then liner over that then liner and fleece ??
Insulation (at the bottom) is not needed and is a waste of money.
Don’t add fish to the water as they produce nutrients
Planting and Suitable plants
Pickeral weed – blue flower
Purple strife
Cuckoo flowers
Fringe Lilies
Blue Iris or Siberian Iris
Dragon Iris
There is no good or bad time to plant.
DPB has a high density of plants so that the pool is working well because the plants are depriving the algae of nutrients
DPB built a floating tyre covered in fleece then hessian to plant in.
Bubble mechanics and design
The smaller the pipe that the bubbles rise through the faster and higher the rise of the water. Four inch pipe doesn’t lift water but if its low enough in the water it will move a considerable amount of water. A rule of thumb – one (?3 inch) bubble pump outlet pipe for every 5m linear. 68mm rainwater pipe (its standard drainpipe) is cheap. Koi pipe is more expensive. https://www.elitekoi.co.uk/collections/pipework-fittings because it is purpose made for ponds. Anything that says its designed for ponds seems to be sold at a premium.
The vertical pipes need to be ?100m high ? from the bottom?
The compressor pump: no need to be working in the winter. His is on a timer and only runs during daytime in the summer. (One website says keep running constantly) His is a Hailea Air pump https://www.onestopgrowshop.co.uk/products/hailea-aco-super-silent-air-pumps . The pump can be quite remote from the pond – for electrical safety He has six airstones all at the same depth. You need to use airstones in order to create bubbles not just move the water. Have the same length of pipe to each one. Having them all supplied from a loop ensures the same pressure to each one – like a 13A ring main in a home – all have the same voltage.
-
Meanwhile… garden renovation in SE1
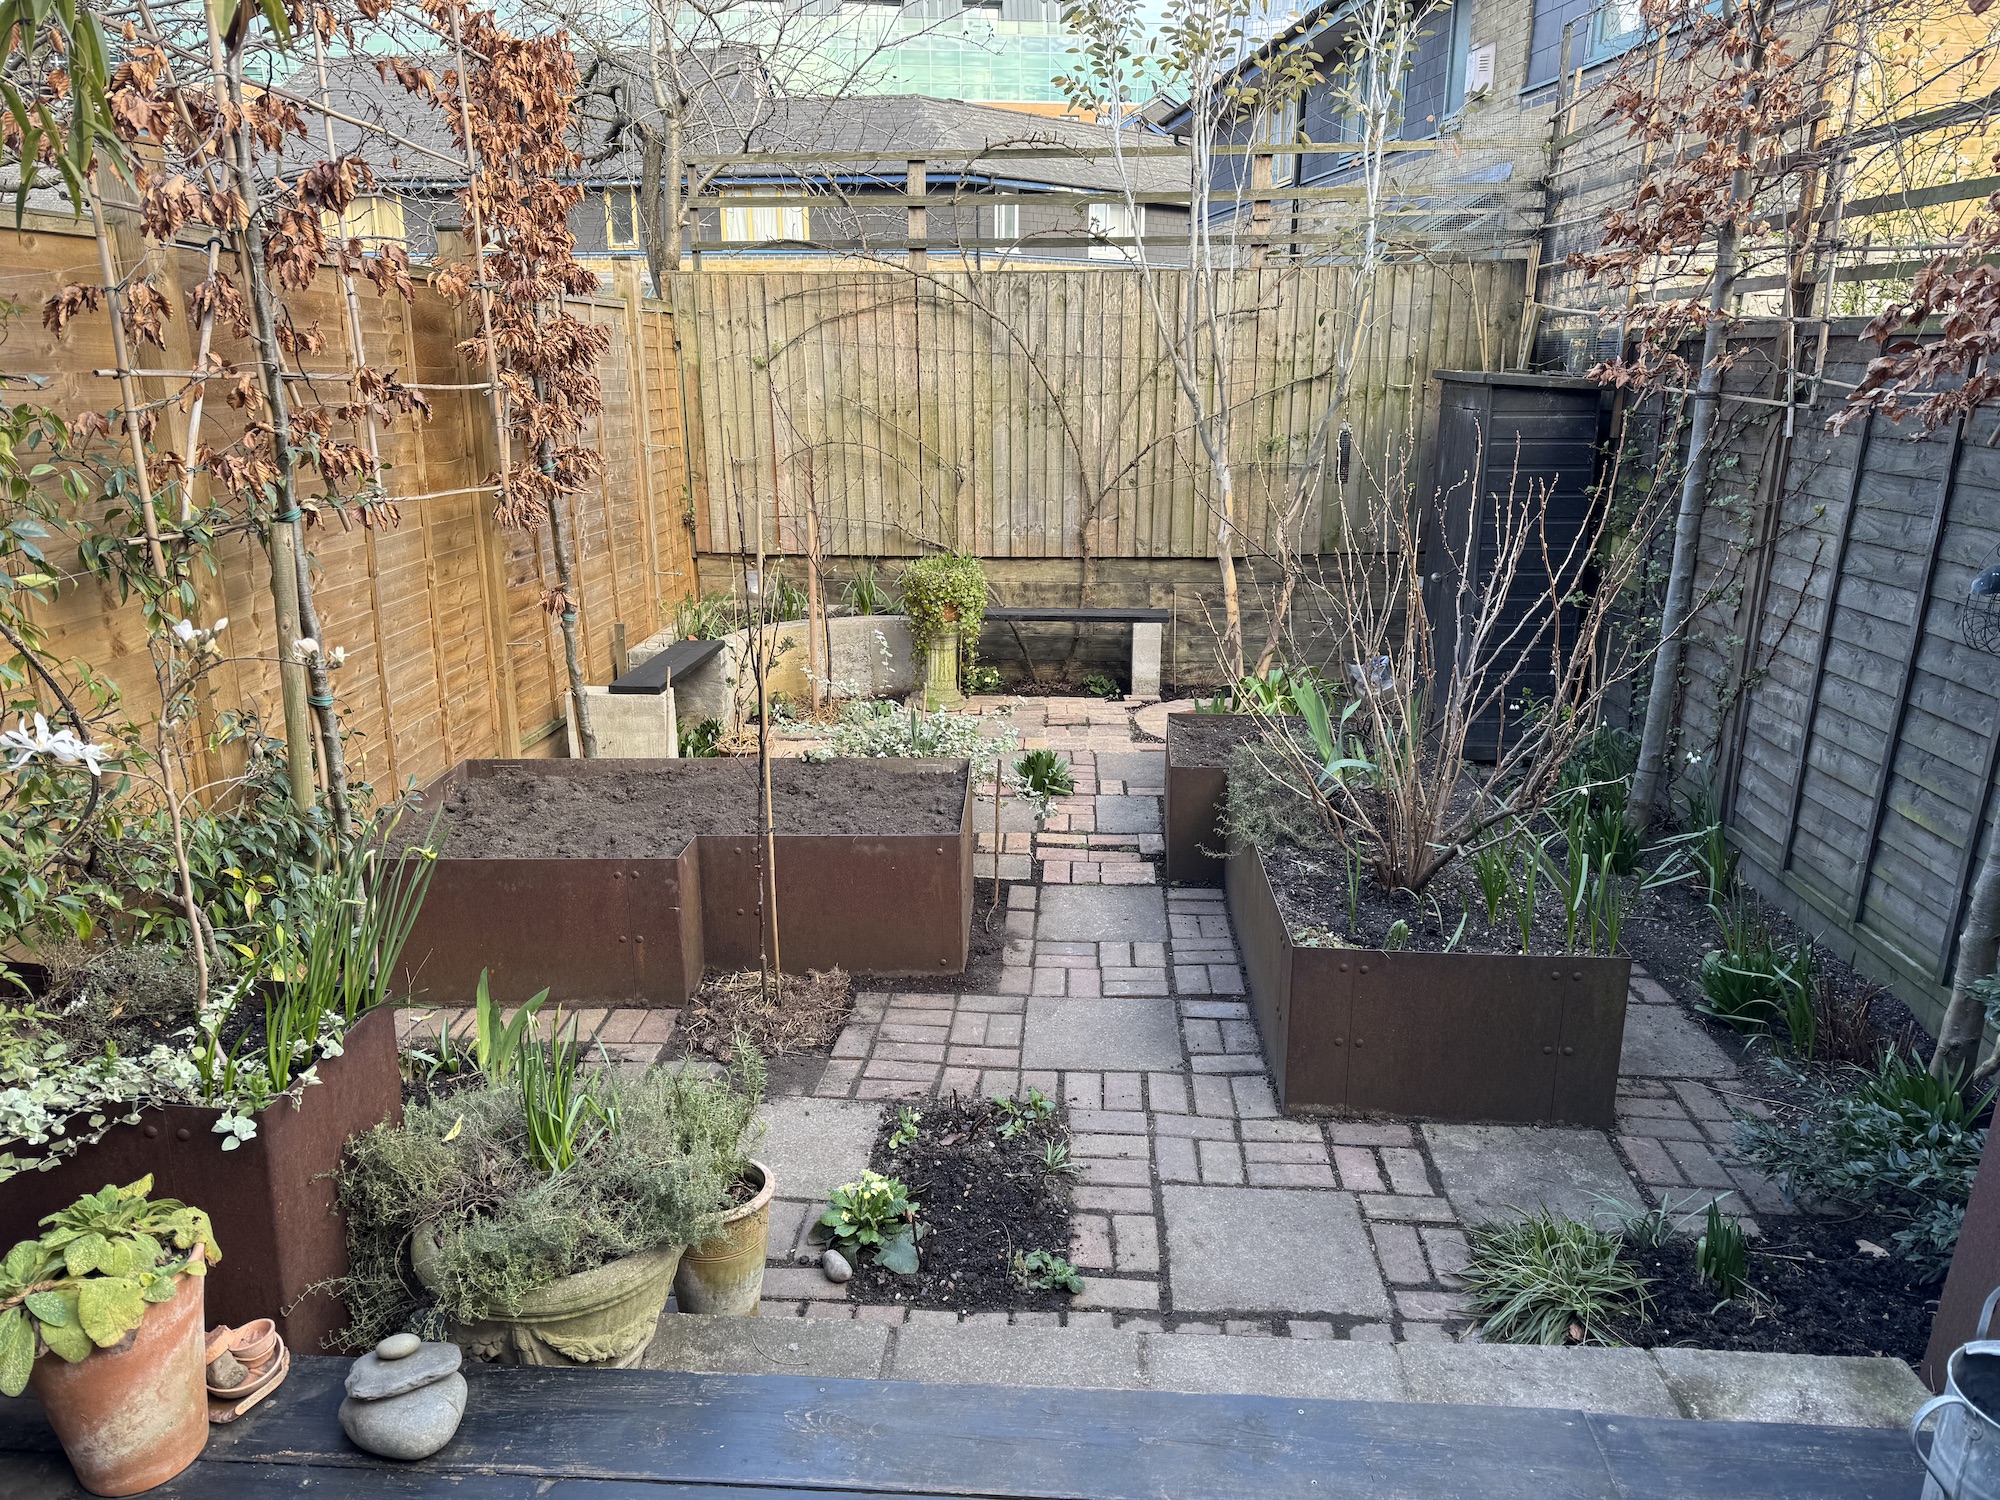
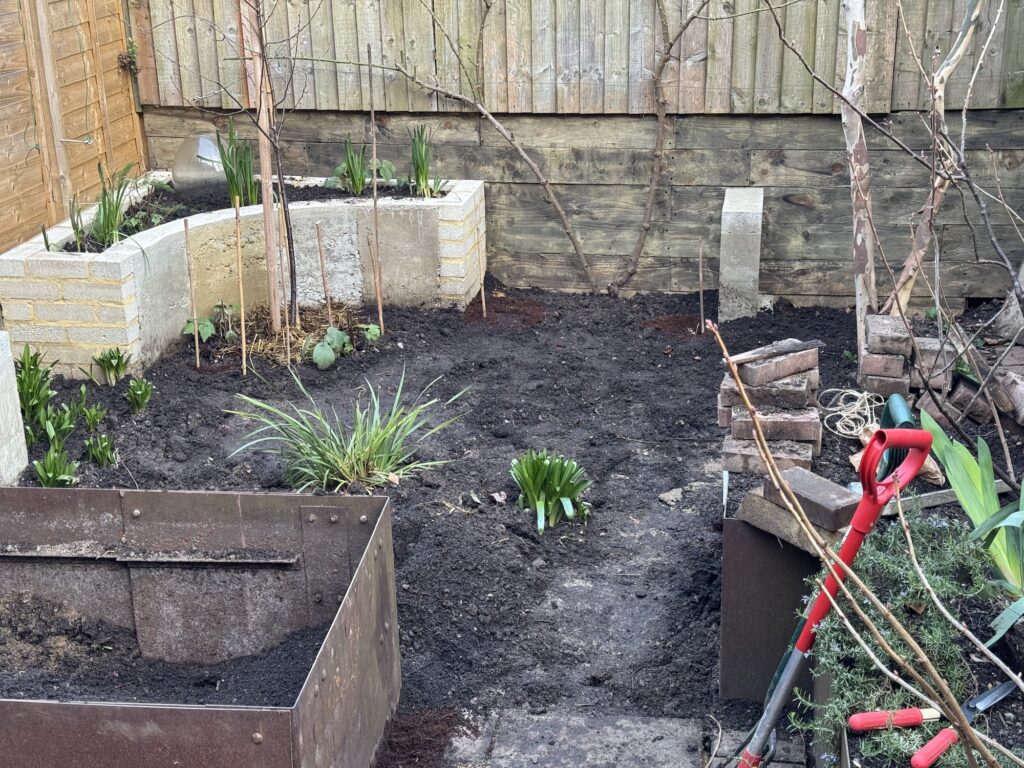
While nothing is happening on the land, or something is happening behind the scenes, we decided to refashion our small garden here in London. It involved learning some major new skills: bricklaying, casting concrete, and cutting things with an angle grinder. We (I) started in December 2024 and finished half way through March.
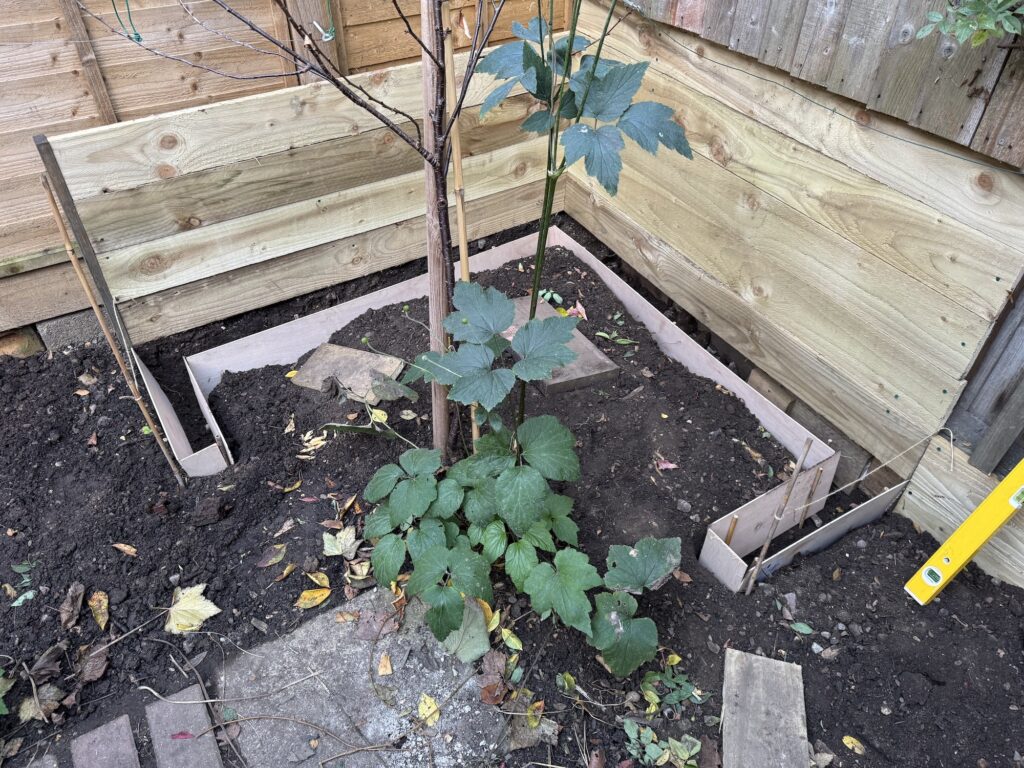
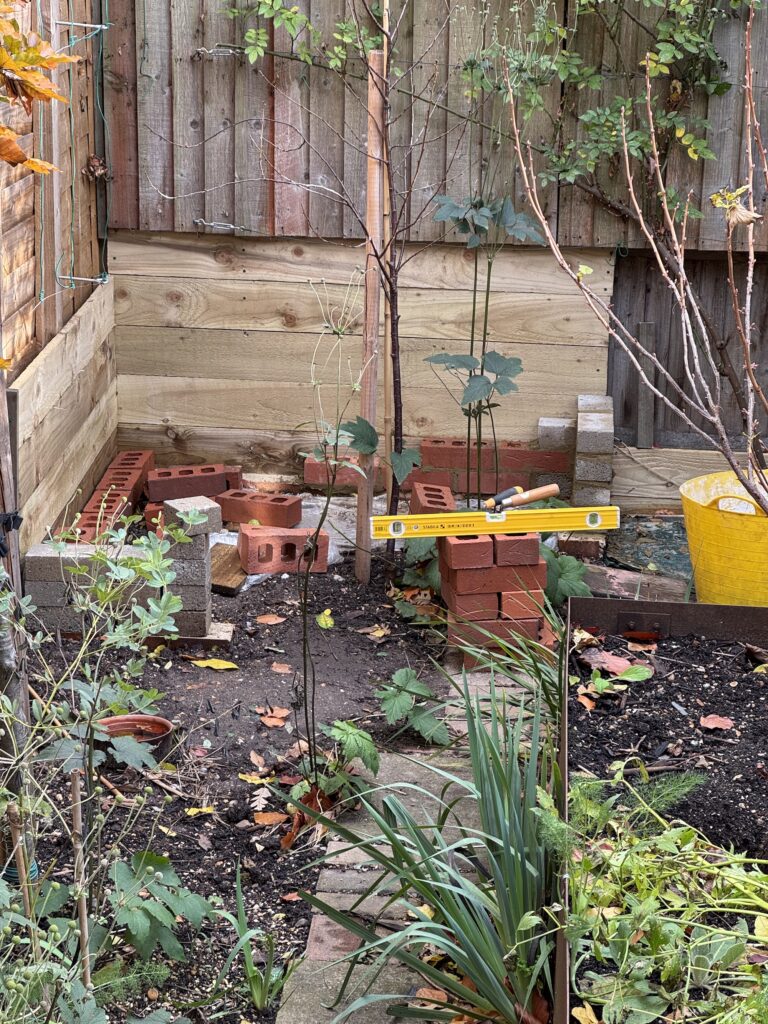
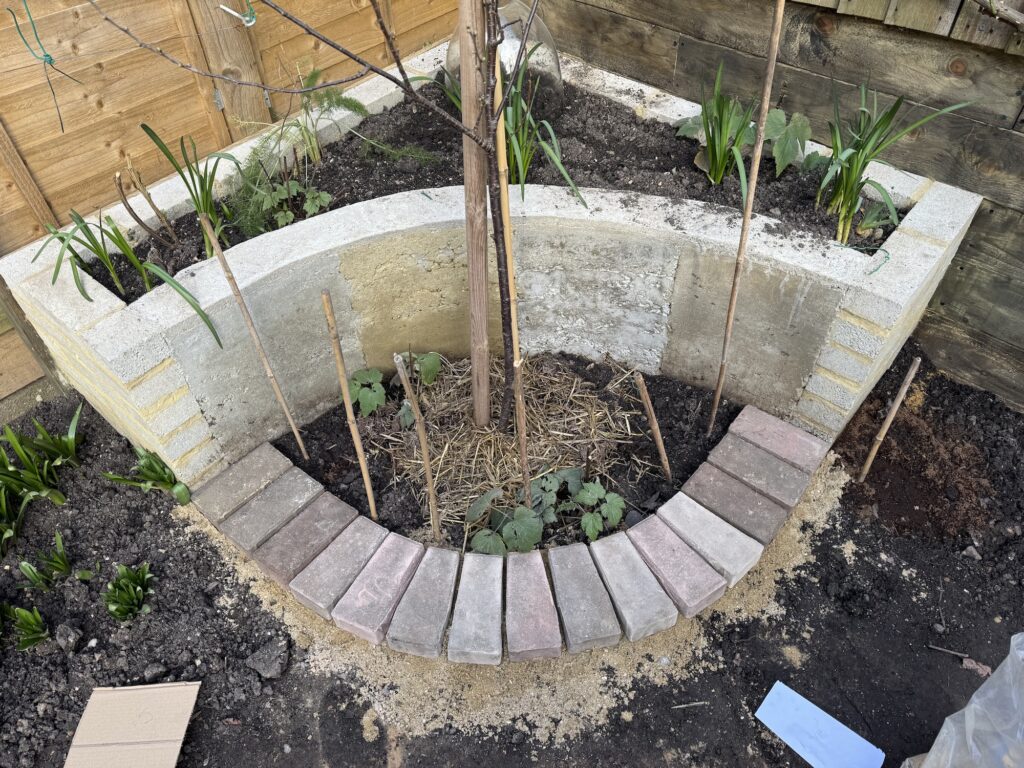
The idea was to make better use of the most sunny place in the garden by building a raised bed in the far corner. Our first idea was to build the back of this bed out of gravel board and fashion a curved front from concrete. We realised that piling a few feet of earth against this wooden barrier was not a good idea. It would not take that long to rot, so a rethink meant that, of course, we should build it out of bricks. Enter an account with Selco which is 15 minutes drive away and cue the purchase of many bags of sharp sand, building sand, concrete bricks, engineering bricks, gravel and MOT.

Foundations did not need to be that deep – between 200 and 300mm. The thing was to make them absolutely level.
Once the gravel and other aggregates had set, I could start building the walls. The idea was that all the visible brickwork would be of concrete bricks. I’m not sure why we decided this because we ended up painting them a slightly darker colour at the end because they stood out too much. Once we had decided to use bricks we had the idea of having planks of wood to use as benches – one end on the brickwork and the other on piles/plinths, firstly of brick but then we decided of concrete.
We kept the gravel board in place – and later extended it across the entire back fence.

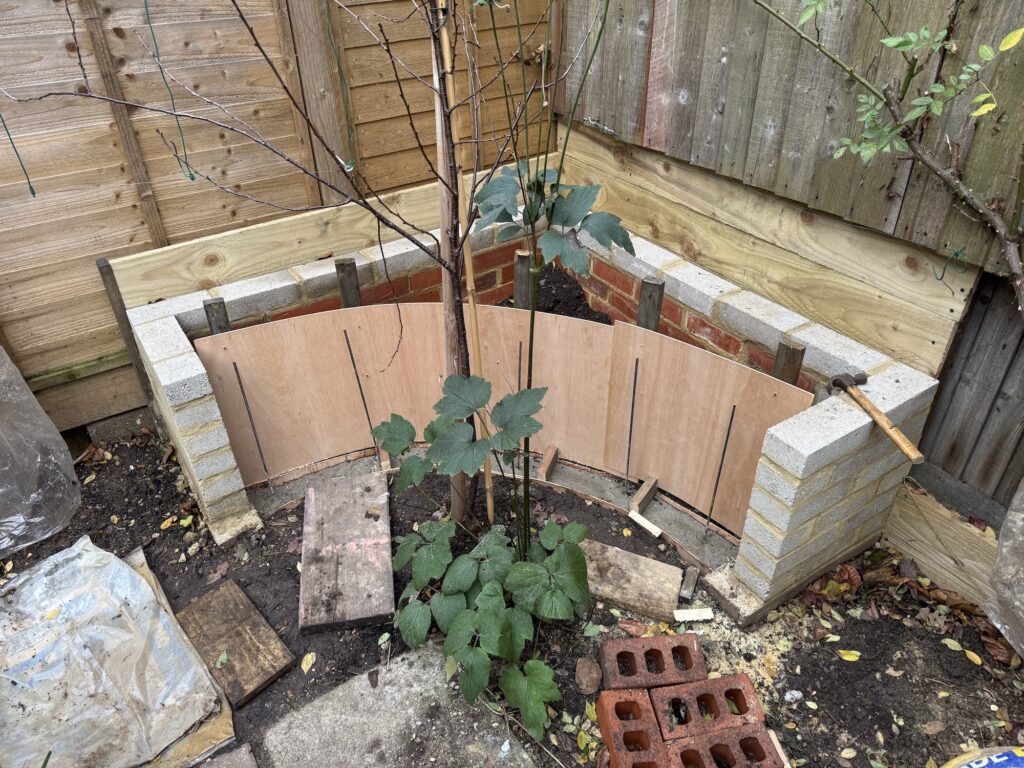
We knew the curved front wall would be a challenge but I bought some thin plywood that I could bend to the right shape and keep in place with a mixture of clamps and posts in the ground. First thing was to make a curved foundation.

Then build the structure for the wall on top – once it had set.

You can buy rebars at Amazon, believe it or not, and the mesh was something we had lying around, fixed to the brickwork at each end with ties from Selco.
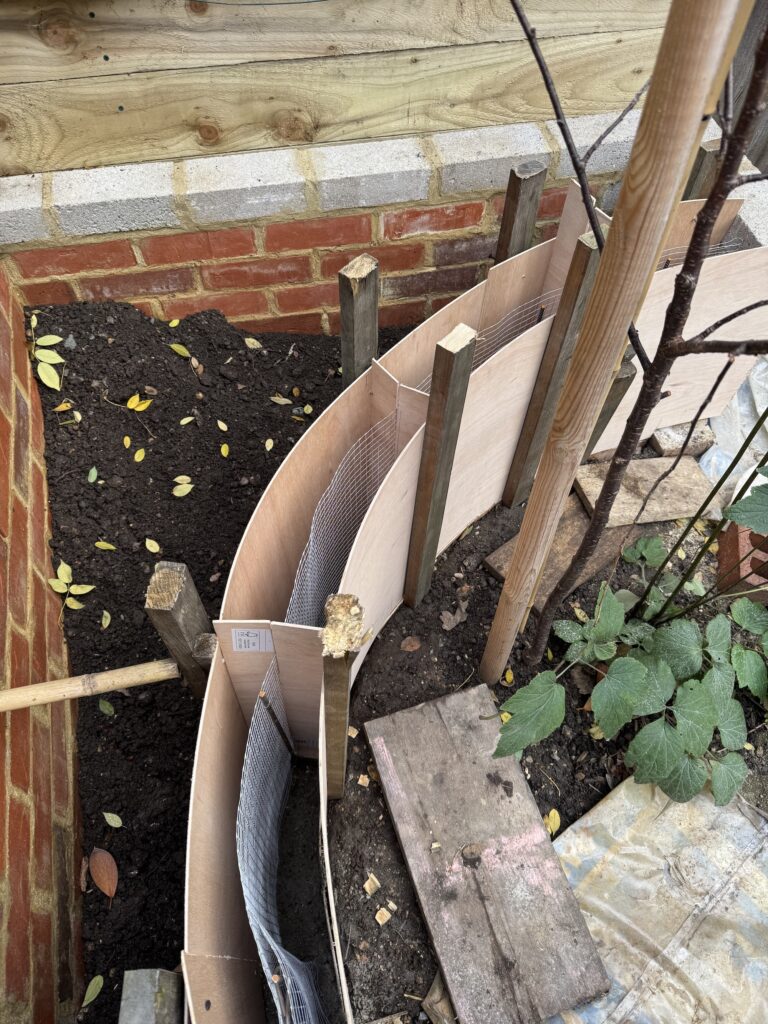
I put removable barriers inside the form so I could try different mixes of sand and cement and other aggregates like gravel and MOT (not very successful). I could remove them once the first section had set and then move on to pour the next. All the concrete was hand mixed.

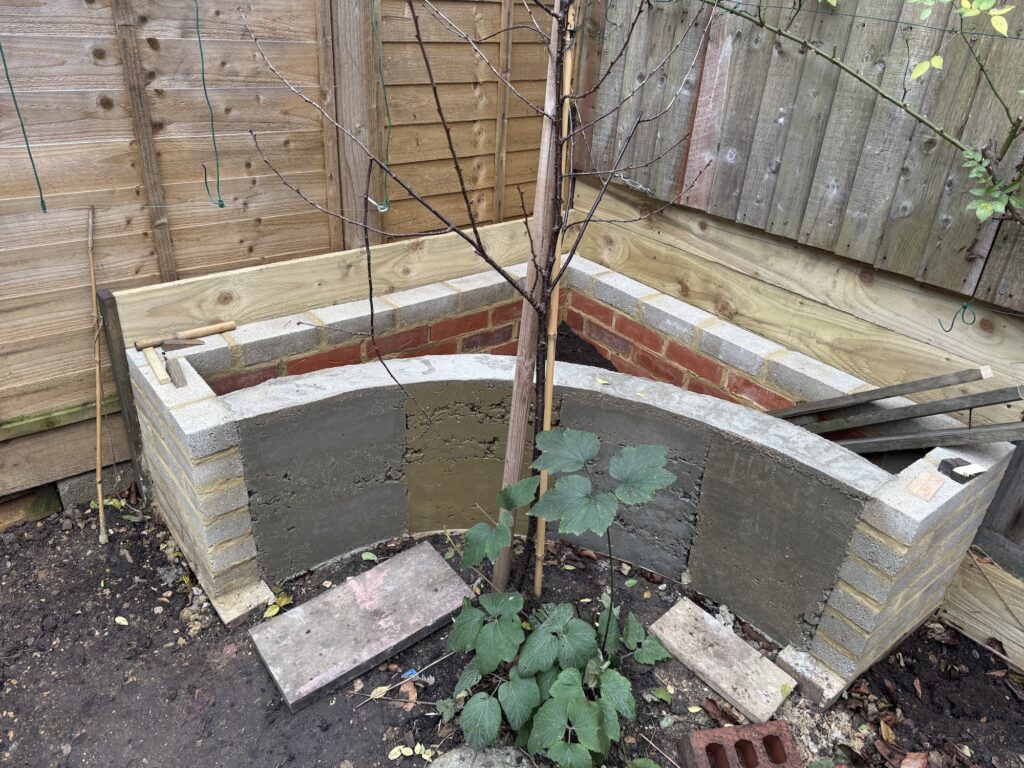
There was a young and fragile cherry tree in situ that made the work tricky. I ended up breaking only one branch in the process. Here are the four different mixes. Looking back I wish I had just used sharp sand and cement (5 to 1). Its the mix on the right. The yellow section is building sand and cement. The top is a layer of sharp sand and cement.
The next job was to form two concrete plinths for the planned benches to sit on.

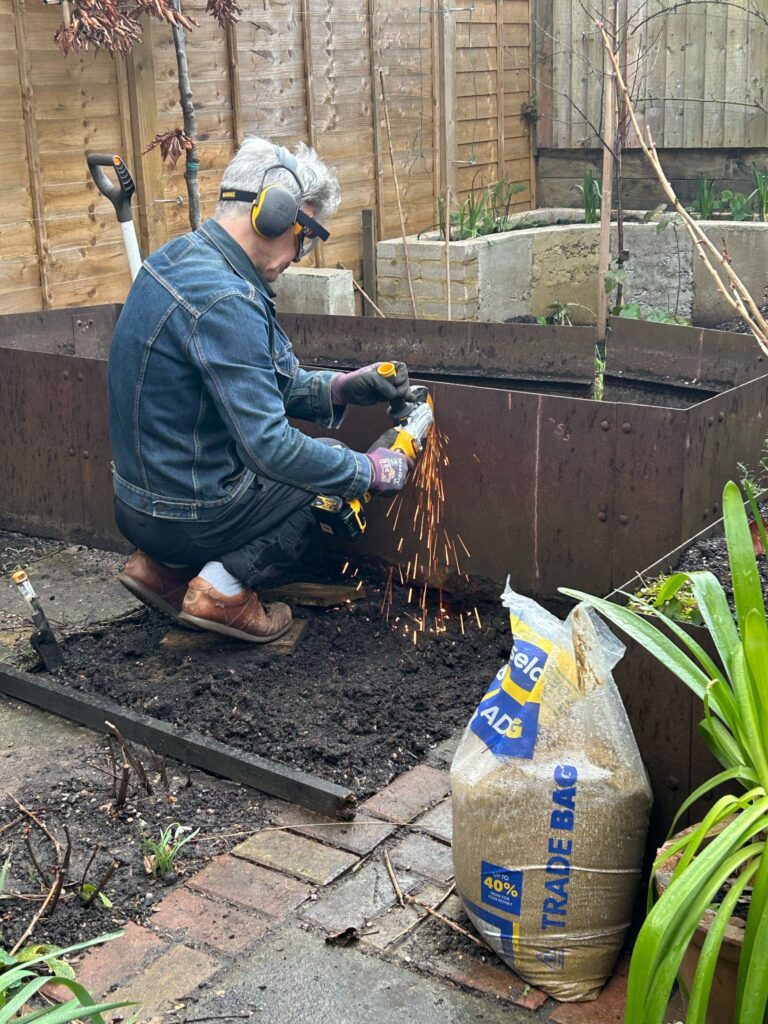
The next job after that was to cut down one of the existing planters (there were two) made of Corten steel and turn it through 90 degrees and move it. This job put a strain on my cordless angle grinder meaning lots of changes of overheating battery. Also PPE was absolutely necessary for this job and even more so for the very dusty job of cutting bricks later on.

Actually moving the planter once it was reduced in size and bolted back together was not difficult. Once done we started redoing the existing paving before moving on to repave the rest.
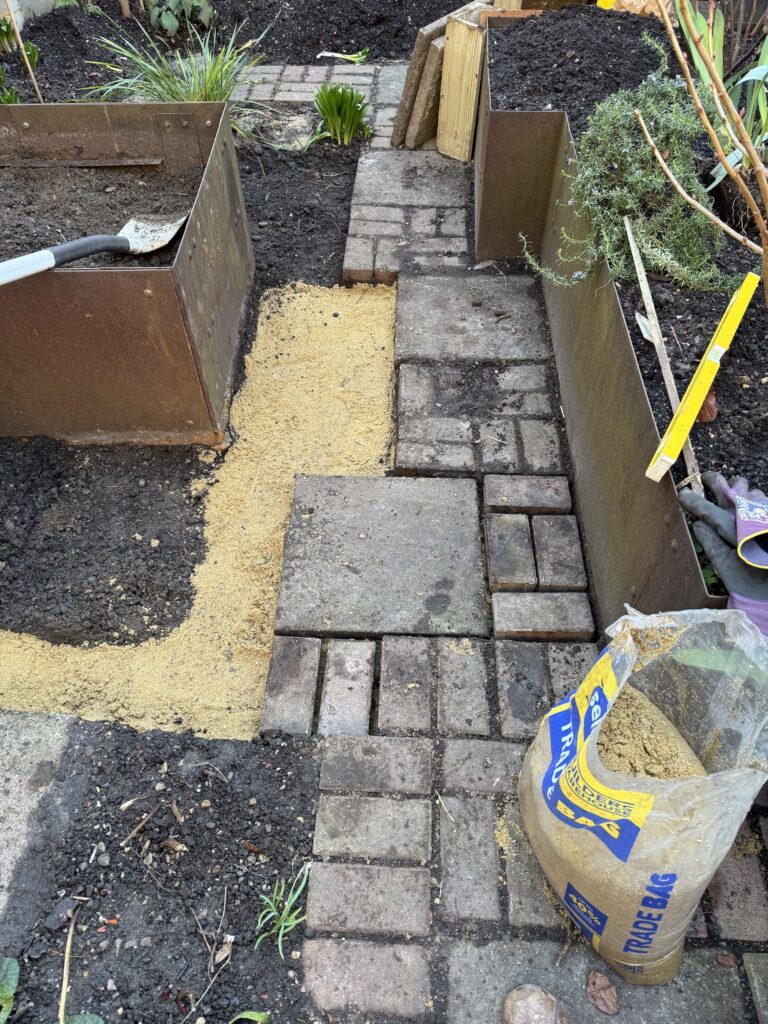
We wanted to lay the paving bricks in curves, around the new raised bed and around the Eucalyptus tree in a circle. This meant cutting about 45 or so bricks which was a nasty job, mainly because of the huge amount of dust it made. I fashioned a kind of dust container inside the planter – lined with ply wood and plastic bags but everything ended up covered in dust including me.
Working out the layout was not straightforward.
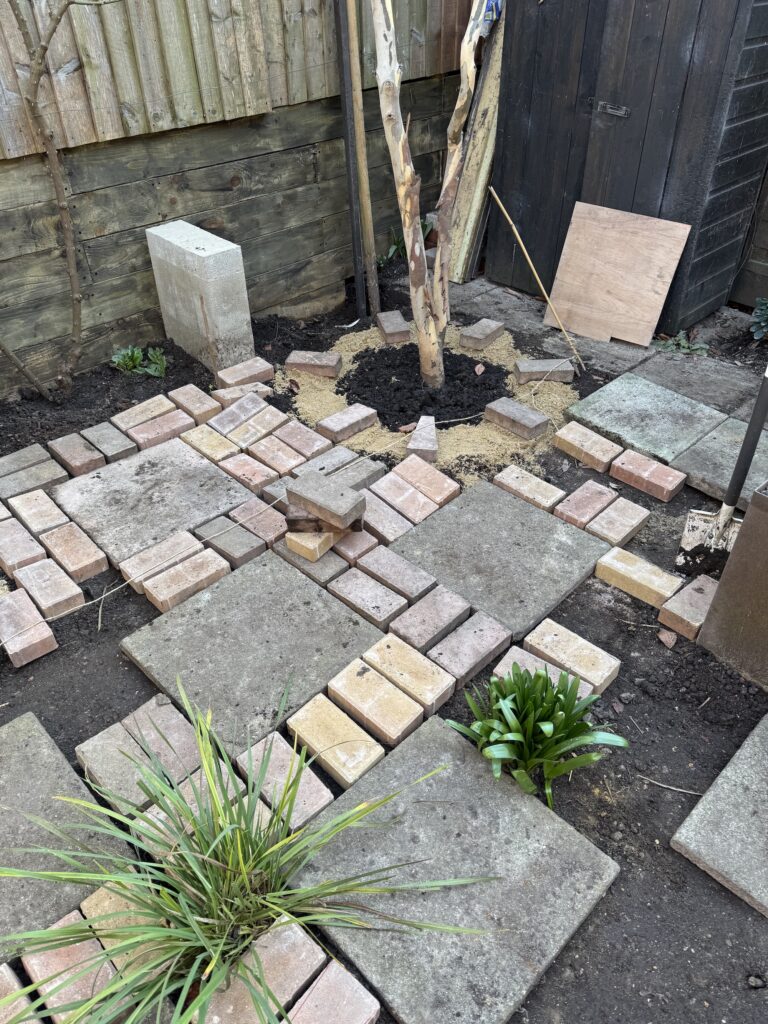

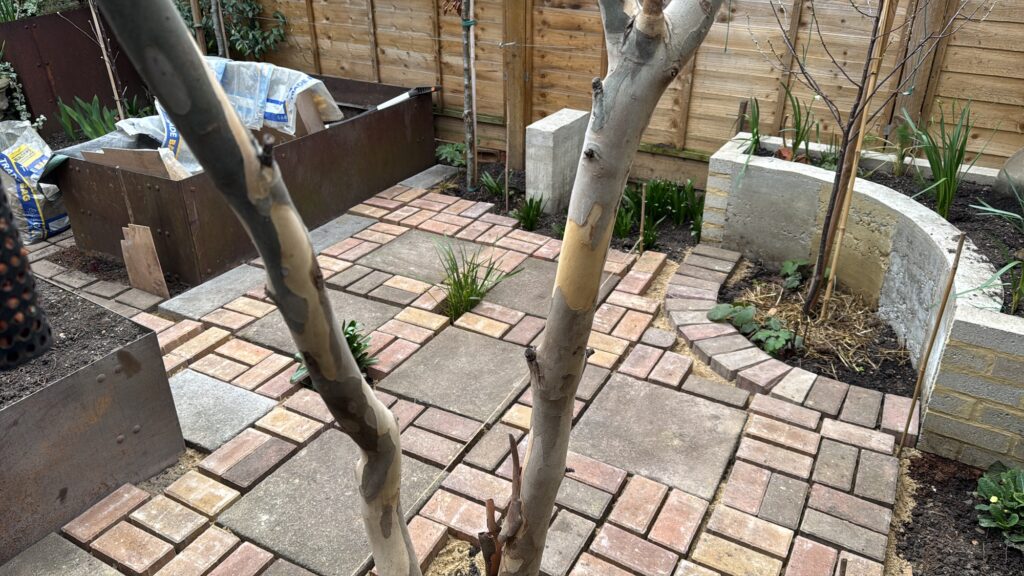
The more-or-less last step was grouting the paving, in some places with earth where we wanted to grow some ground cover and in other places with sharp sand.


The circle of bricks around the tree is not quite finished in this picture.
-
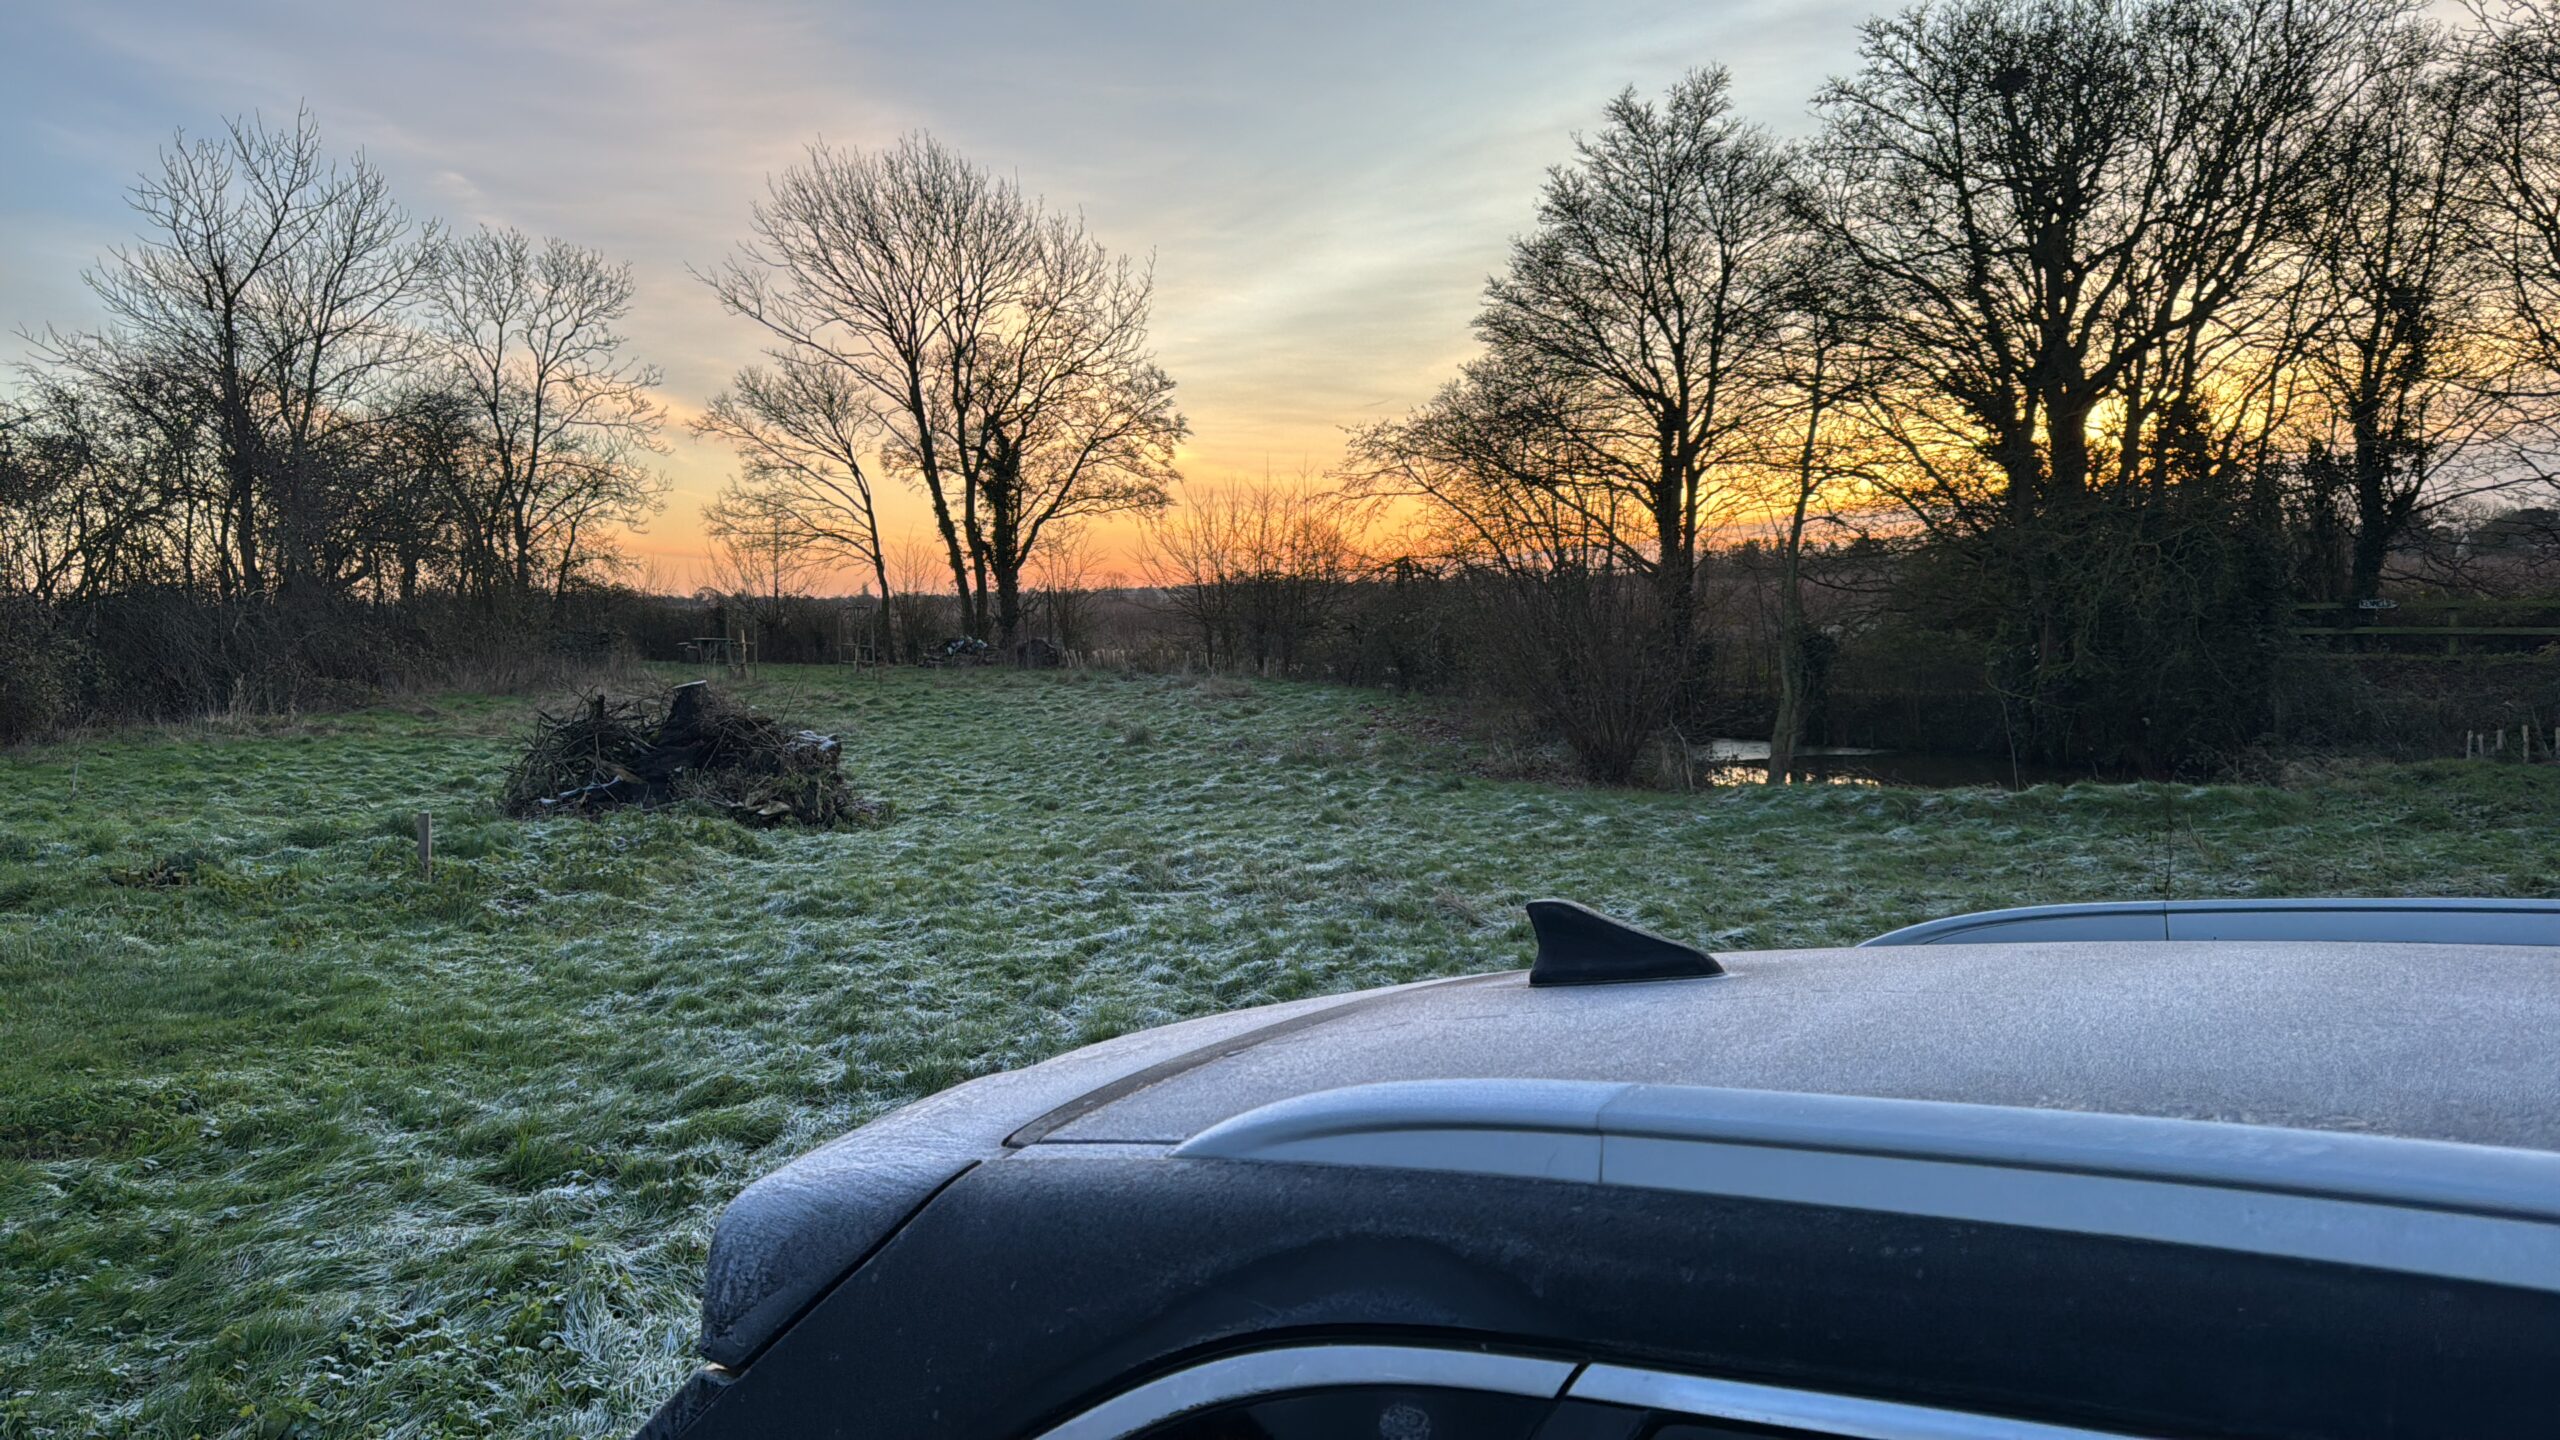
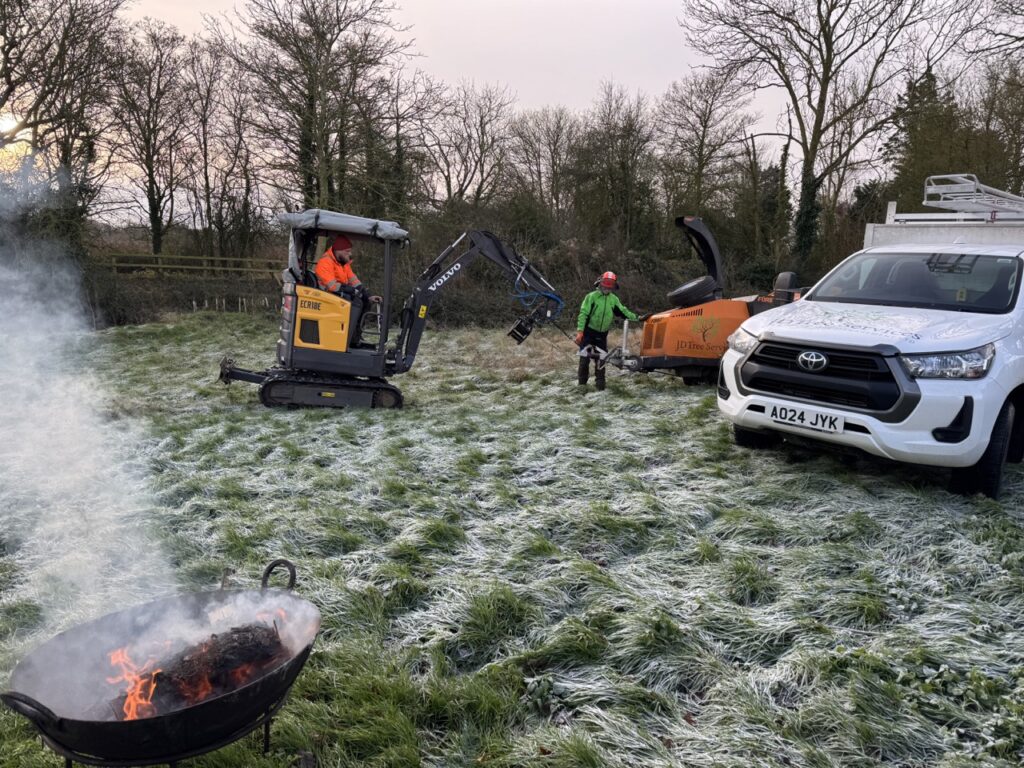
A frosty day up on the land
January 7th and 8th and I’m up on the land to let in our tree and landscaping person and hang around for a while in the cold. We have never attended to the long border on the north side of the land. There are lots of brambles at one end and over the last 6 months or so at least two of the poplars have died and one has collapsed very close to the existing barn. Another is now at 45 degrees, so we need to act in advance – probably well in advance – of any building work starting.
I stayed a night at the very reasonable Brome Grange Best Western hotel, a couple of miles up the A140.
I am amazed at the strength of the tools that they use both to cut up and chip these trees. They did all the work in a day.
At first I was paralysed with cold or rather the prospect of getting colder and colder but I twigged that some early spring cleaning of the barn – sweeping out the leaves that always find their way in under the doors and cleaning the bird shit from the surfaces – warmed me up. It felt good to reconnect with the building and the whole space. I hadn’t been there for a while and things feel more in limbo, strangely, knowing that we will build here but not knowing when the initial demolition work will start and who will do it. Things move so slowly that I don’t even dare to anticipate that the building will start this year.
-
A glacial pace
Since starting this blog, I have to say, very little has happened. We have met with our consultants – online – and the energy consultant has produced a very detailed assessment of our energy needs along with a proposed design about how to meet it. This is a crucial part of the project and good to get a sense of what it will involve early on. Its looking likely that we will need an outbuilding/shed of some kind that will house the equipment needed by the borehole for water pumping and filtration and with another array of solar panels on its roof, as well as a diesel generator that will be needed on some occasions, I think mostly in winter, when the solar panels do not produce enough energy to keep the batteries charged. This structure will need an approach to the planning department but I am unsure if it will need another formal application. Our architect is optimistic that it will be approved.
We met back in June or July and were expecting more detailed plans to look at and approve about a month ago, ready for the quantity surveyor to go through and then use as the basis for tenders to building contractors. But its 10th September now and this hasn’t happened. The crawling pace is dispiriting and it is easy to lose touch with our original motivation for this project and certainly the excitement evaporated long ago. Its now just over four years since we bought the land.
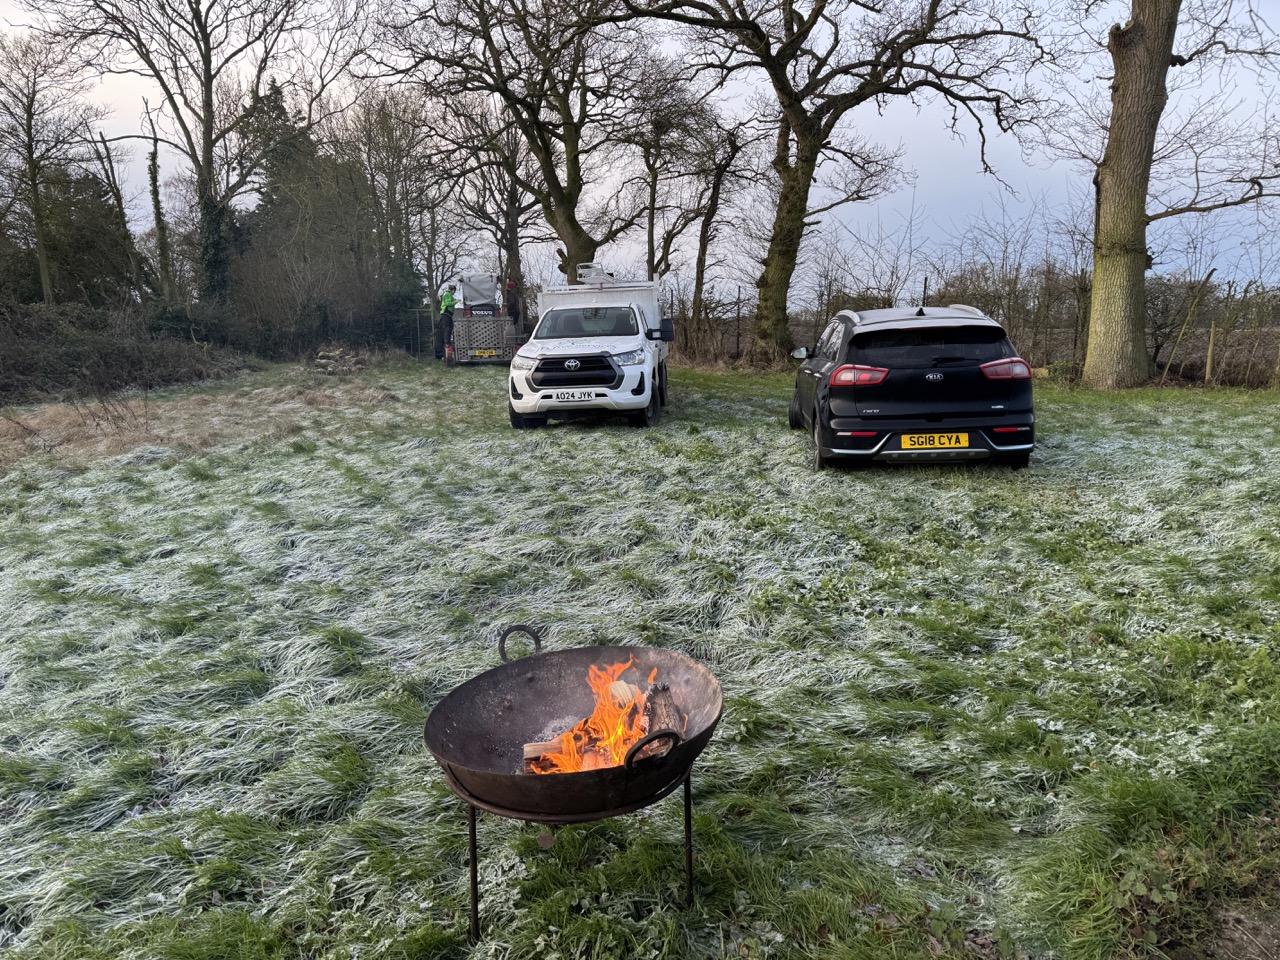
We visited for the day yesterday and cooked some delicious marinated lamb and aubergines on our firepit. It was raining earlier in the day but we had a dry hour or so for this and a little weak sunshine. A company who sell farm and rural equipment came and collected the lawnmower which has been running badly and eventually died last time I used it and now won’t start. We also bought a 4 metre long fruit-picking pole and brought back a bowl full of pears from our pear tree.
-
Consultants
I had not realised how many different consultants you can invite into a project like this. The consultants that our architect is engaging are as follows:
Structural engineer – who also provides civil engineering services which, I think, means anything under the ground as opposed to structures above the ground, load bearing and materials. I wonder whether the civil engineer advises on the borehole, sewage treatment plant and other water management.
Mechanical/Electrical/Environmental consultant – I presume they play a central role in designing the off-grid elements of the building, energy needs and provision. I wonder whether they have input into the design and choices about the water management as above.
Quantity surveyor – I think this person can also recommend the use of alternative materials that might be cheaper.
VAT consultant – I didn’t know these people exist but can see how important they are because some elements of the build are zero rated for VAT while others attract 20% and some a reduced rate. They cost about £1500 and I can see they could save much more than their fee.
(links are for illustration and not the consultants we are using)
-
How did it all start?
Let’s try and find the origin of this project. It started, for me, with a desire for a space that was a kind of opposite, or at least, alternative to where I was living. Where I was, the night was bright with streetlights – I imagined somewhere with no light pollution at all. Where I was, there was the constant sound of building work and traffic – I imagined somewhere where there could be total silence. Where I was, the neighbours were just the other side of a slim brick wall, left and right, above and below – I imagined solitude. I imagined in this space enlightenment would be just a step or a breath away.
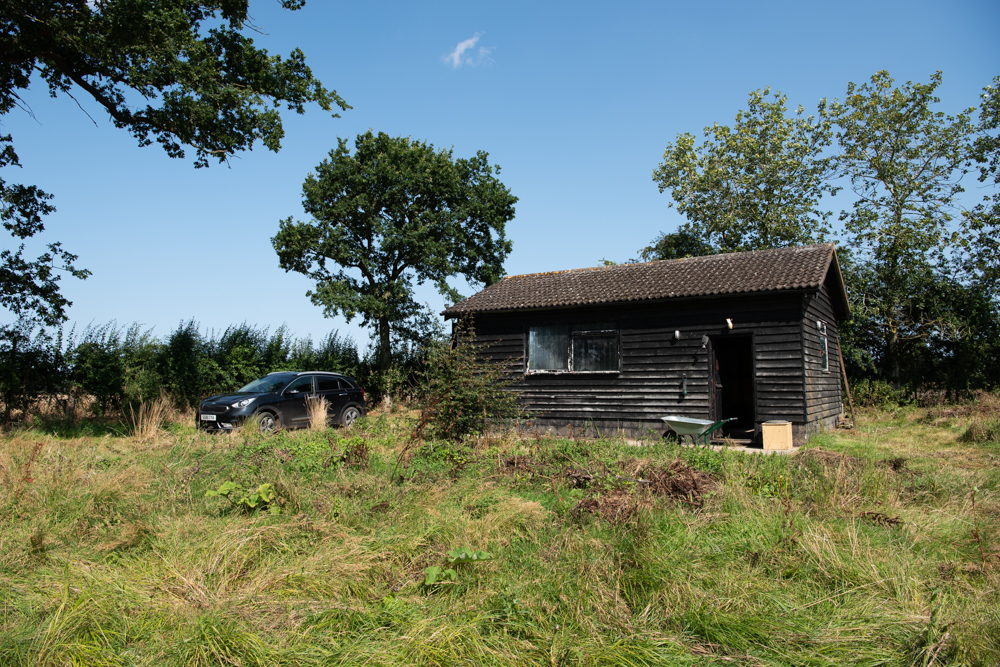
I don’t remember when or how exactly these desires developed, but I can say that on Wednesday 22nd July 2020 a piece of land in mid-Suffolk of 0.45 of an acre went under the hammer at auction and was won thanks to H’s confident bidding, even though it was our first taste of an auction. Some days later, in early August, we drove up to Norwich and collected the keys, one to the gate of the land and the other to the padlock on the door of the building nestled in the corner of this pocket-shaped plot. Other agricultural buildings had been demolished by the previous owner.

The building was a variant of Suffolk’s typical black barns. Historic maps showed that there had been a building on this site at least since 1895, but this particular incarnation was of much more recent date, made from a mixture of reclaimed and modern materials. The building housed abandoned objects and rusty tools and seemed to have recently been a dwelling place for a number of birds. The site was sold, as so many are, with recently gained planning permission to build a smallish home, shaped as an extension around two sides to the existing barn. We knew that we did not want to build the building that had been approved – it had a distinctly off the shelf feel. The materials were completely wrong for the area for a start.
It was very clear when we bought the land that connection to services – mains water, drainage and electricity would be expensive and difficult, in fact prohibitive. Very quickly it was apparent that this would have to be an off-grid project. This would add to the complexity but also to the interest of the project. We contacted and then hired a firm of Architects who had experience of building in the area and had built an off-grid barn that had many similarities to our own requirements. They developed a design for a, looking back, quite grand building, probably twice or three times the size of the dwelling that had been approved for the site. They made the first planning application in March 2021.
Strangely the land itself was surrounded by layers of peerless fence, chicken wire and metal posts with three lines of barbed wire sitting on top. The chicken wire was buried in the ground, presumably to keep out rabbits but the barbed wire seemed design to deter unwanted humans. It was satisfying to spend our first few visits to the site armed with bolt croppers, a large hacksaw and a crowbar removing all the barbed wire and much of the fence. It was a kind of teenage dream of sabotaging authority.
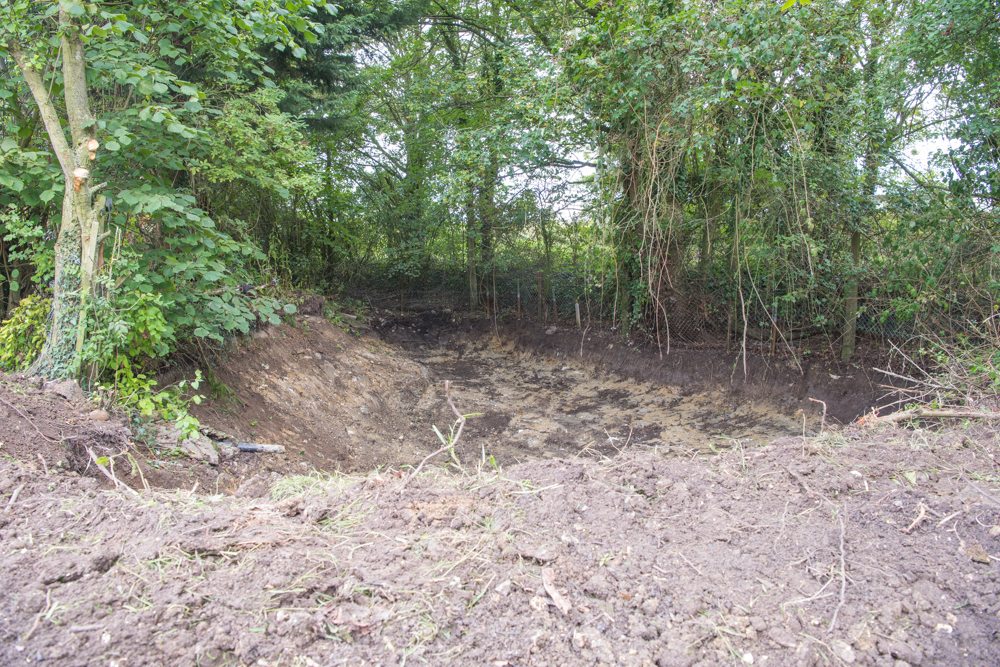
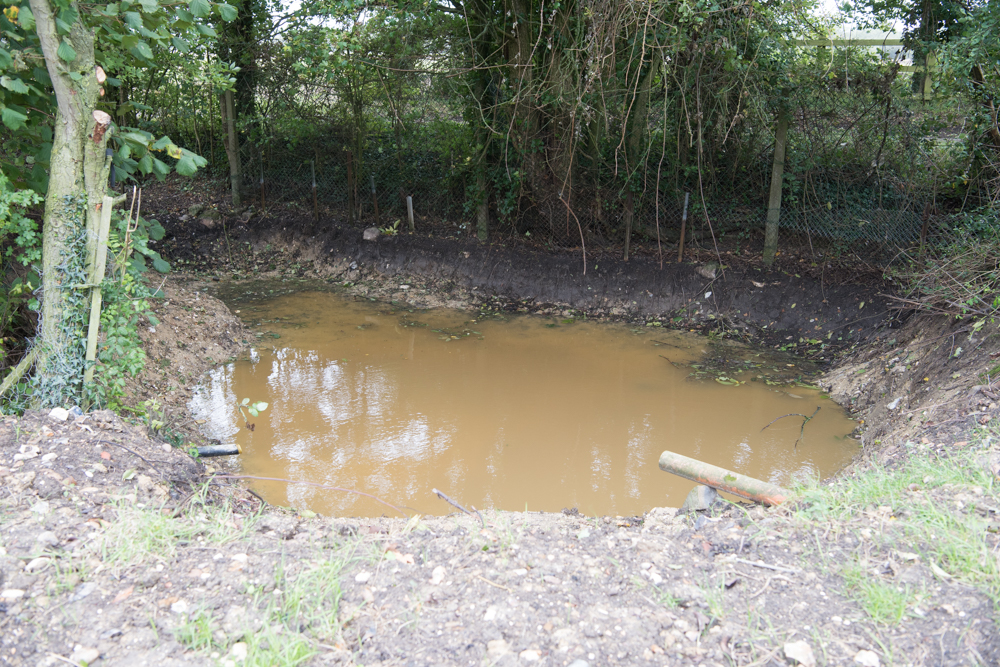
The land was not advertised as having a pond on it, but historic maps showed one. There was a silty dip close to the border by the roadway as its only remnant. We contacted a man with a digger who, in a day, along with a friend with a dump truck, dug out all the soil and weeds leaving us with a deep, clay-lined hollow which started to fill with rain water. We also found drainage pipes that had once drained into it and started draining again, though we do not know where they originate.

While we waited for the planning process we spent weekends pulling down vines and had two out-of-character fir trees cut down. We stayed in a local motel and a couple of times camped in a tent next to the barn.
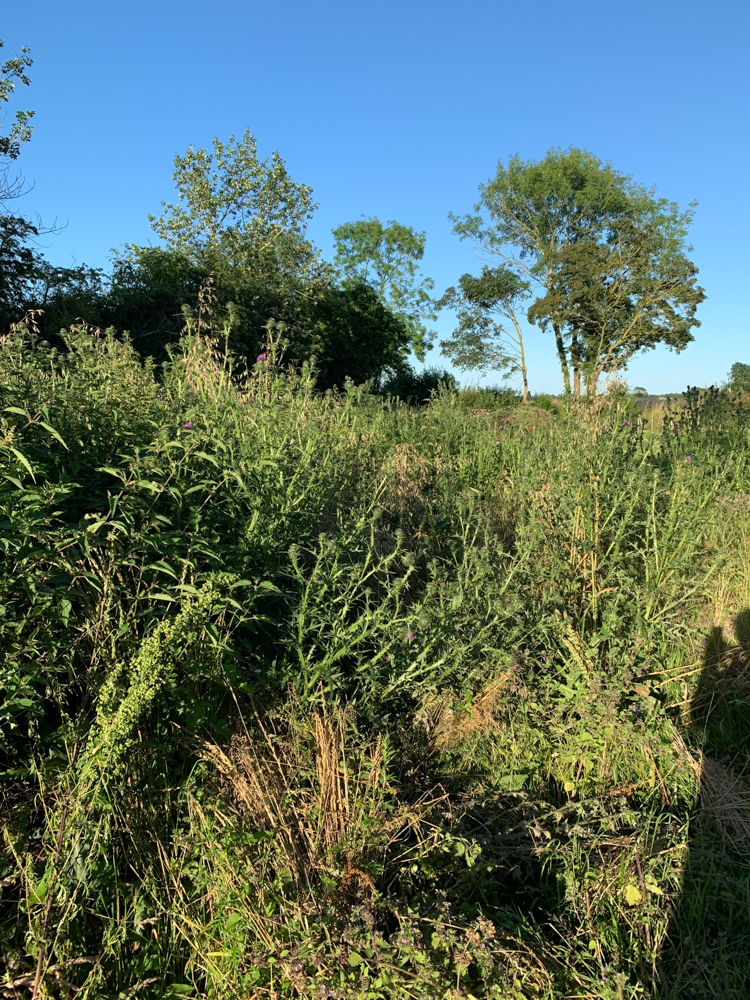
Our planning application was roundly refused. As one (of many) issues was closeness to a line of four mature oak trees along the border, we put in a second application in July 2021 with the building moved a few metres away from them. The long-game of the architect was to lodge an appeal and hopefully have the proposal accepted. The second application was rejected in September 2021 and we put in the appeal in November 2021. Meanwhile we spent visits doing further clearing and bought a large petrol mower and set about trying to keep the grass, along with vicious thistles and nettles under control. Once we neglected the site for six weeks over the summer and returned to find nettles and thistles above the height of my head.
The appeal timescale is much longer than a standard planning application and it was in August 2022 that we heard that we had been refused, meaning two years into the project we were back to square one. We hired a new architect and took a new, more modest approach which was to apply for non-material (or was it material?) amendments to the original plan that had been granted in 2020. The amended plan had the same footprint as the original plan but with different materials and a very different approach to the design – much more thoughtful. This was granted in April 2024. The Parish Council supported it this time and we had three supporting comments from local residents.
This approval was major turning point for morale, naturally. In terms of design approach there has been talk of retaining some of the structure, at least the concrete base, of the barn. The architect has staked out the position of the planned building – we did it in the pouring rain. At the moment we are beginning to meet with a range of consultants hired by the architect including, crucially, the consultant who will, we hope, be responsible for the whole off-grid design.